

Rice Paper Spanakopita Spiral (Crispy and Easy)
Making spanakopita with rice paper instead of phyllo gives you the same cheesy, spinach-filled flavors with a crispiness that phyllo honestly struggles to match at home. Shredded chicken, mozzarella, feta, and sautéed spinach rolled inside egg-washed rice paper and baked until golden. Thirty-five minutes and it tastes exactly like spanakopita should.
At a glance: this rice paper spanakopita spiral uses 7 ingredients, takes 35 minutes total, and serves 2. Rice paper replaces phyllo for a shatteringly crispy exterior. Works with chicken or a vegetarian filling. Best served fresh from the oven.
Jump to:
My sister has always been obsessed with Spanakopita. Growing up, it was her ultimate comfort food, flaky, cheesy, spinach-filled perfection that could fix just about anything. Even after moving all the way to Thailand, nothing ever replaced that craving.
When she came back to visit recently, we made it our mission to find the best Spanakopita in the city. We hit every bakery, café, and Mediterranean spot we could think of, and somehow none of them measured up. Honestly, it was disappointing.
So I did what I usually do in that situation. I made it myself. Spanakopita, my way.

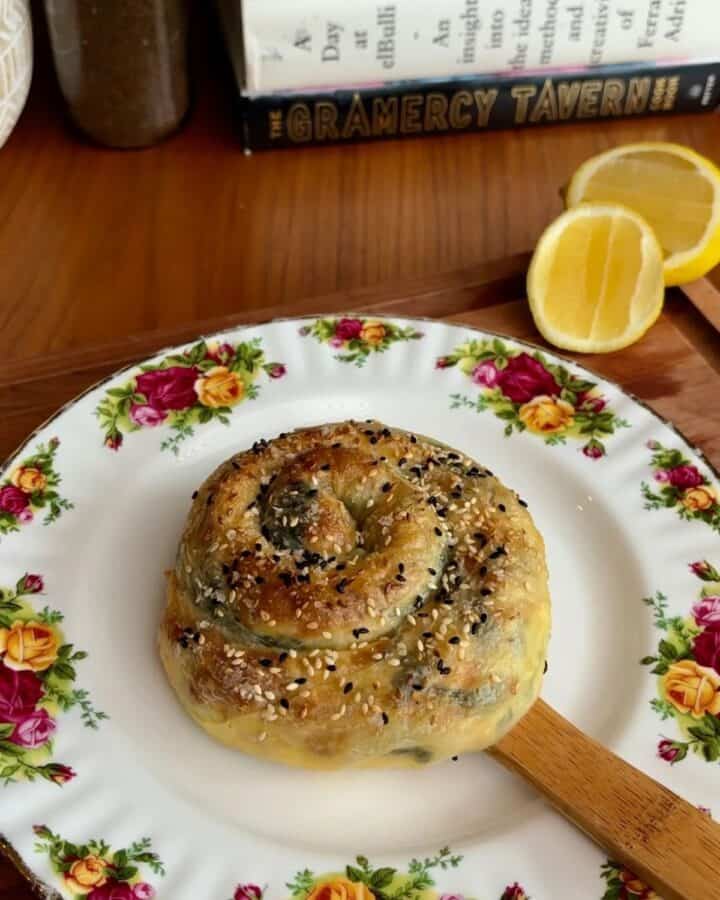
Instead of phyllo, I used rice paper sheets to get that crispy, crackly exterior. Inside, I packed shredded roast chicken, sautéed spinach, mozzarella, and feta for a rich, savory filling. A quick roll, a brush of egg wash, a sprinkle of sesame seeds, and a bake until golden, and suddenly the craving was handled.
If this is your first time using rice paper, let me tell you...it's so much fun. I use it all the time because it's so versatile! The same crispy spiral technique I describe here works just as well for things like crispy Bacon, Egg and Cheese spirals, Chicken Parm spirals, Ham and Cheese spirals, and even a Big Mac burger spiral, which is part of why I keep coming back to it.
Why this rice paper spanakopita spiral works
Rice Paper Outperforms Phyllo at Home:
Rice paper crisps up beautifully in the oven, giving you that flaky bite without the fuss of phyllo. It browns evenly, holds its shape through the bake, and gives you a shatteringly crispy exterior that phyllo actually struggles to match at home without a lot of butter and layering work.
Two Cheeses, Two Jobs:
The filling is hearty and balanced, with creamy cheese, savory chicken, and just enough spinach to keep it grounded. The combination of mozzarella and feta is doing something specific here. Mozzarella melts and binds the filling together so it holds its shape when you slice. Feta stays crumbly and sharp, adding the salty, tangy flavor that makes spanakopita taste like spanakopita. One without the other and you lose either the structure or the flavor.
The Spiral Shape is Doing Real Work:
Rolling it into a spiral rather than leaving it as a straight cylinder does two things. It creates more surface area for browning, so you get crunch on more of the exterior. It also makes the whole thing look considerably more impressive than the effort involved, which is never a bad thing.
If this recipe gets you in the mood for Spanakopita, I have to send you over to my Spanakopita Tortilla Quiche recipe too. It comes together so easily and hits all the same favorite flavors!
"I love Spanakopita and this rice paper version nails it."
- Jill (email subscriber)
Recipe

Rice Paper Spanakopita Spiral (Crispy and Easy)
Watch:
Ingredients
Equipment
Method
- Make the Filling: Combine chicken, spinach, mozzarella, and feta in a bowl. Season with salt and pepper and mix to combine.
- Prep the Rice Paper: Whisk eggs on a shallow plate. Dip each rice paper sheet into the egg wash for a few seconds, then lay flat on a lightly oiled board or cutting board.

- Roll: Spoon the filling in a line across the center of each sheet and roll tightly into a cylinder.

- Shape: Gently curve each roll around itself to form a spiral, tucking the end underneath to hold.

- Season and Bake: Brush the outside of each spiral generously with egg wash and sprinkle with sesame seeds. Bake at 400°F for 15-20 minutes until golden brown and crisp all over.

- Serve: Serve warm with lemon wedges on the side.

Notes
- Have your filling ready before dipping the rice paper. It softens quickly once it hits the egg wash.
- Drain your spinach thoroughly before mixing into the filling. Excess moisture is the main cause of a soft spiral.
- Don't overfill. A line of filling the thickness of your thumb is the right amount.
- Best served fresh. Reheat in the oven or air fryer at 350°F for 5 minutes to bring the crunch back. Avoid the microwave.
- Swap chicken for roasted vegetables for a vegetarian version. Keep fillings as dry as possible.
Nutrition
Tried this recipe?
Let me know how it was!Chef Notes
On the Spinach:
This is the step most people skip and then wonder why their spiral came out soft on the bottom. Fresh spinach releases a significant amount of water when it wilts. If that water goes into the filling, it steams the rice paper from the inside rather than letting it crisp. Squeeze the sautéed spinach in a clean kitchen towel before mixing it with the cheese and chicken. Press firmly. The amount of liquid that comes out is always more than expected, and removing it is the difference between a crispy spiral and a soggy one.
On the Filling Amount:
A line of filling roughly the thickness of your thumb down the center of each sheet is the right amount. Too much and the spiral is difficult to roll tightly, the seam gaps open, and the spiral unravels in the oven. I've overfilled batches before and the result is a spiral that looks great going in and splits open halfway through the bake. Err on the side of less filling and a tight roll every time.
On Working with Rice Paper:
Rice paper softens the moment it hits the egg wash, so have your filling ready before you start dipping. Don't dip all three sheets at once and then try to fill them. Dip one, lay it flat, fill it, roll it, then move to the next. If a sheet tears slightly, press it back together. The egg wash acts as a glue and seals small tears during the bake without any visible difference in the finished spiral.
On Reheating:
The oven or air fryer at 350°F for 5 minutes brings the crunch back reliably. The air fryer is actually better for reheating since the circulating heat crisps the outside more evenly than a static oven. The microwave will soften the rice paper entirely and you'll lose the crunch. If you find yourself reheating these regularly, my Bacon Egg and Cheese Rice Paper Spiral reheats in the same way and is worth having alongside this in your regular rotation.
On the Air Fryer:
This spiral works well in the air fryer. Cook at 400°F for 12 to 15 minutes, checking at 12. The circulating hot air crisps the rice paper more evenly than a static oven and you get consistent browning all the way around rather than just on top. If you're making multiple spirals, make sure they have enough space in the basket - touching sides won't crisp properly. Standard 8.5 to 9 inch rice paper sheets work best regardless of whether you're using the oven or air fryer.
Common questions about the Spanakopita Rice Paper Spiral
Yes. You can assemble the spiral, cover it tightly, and refrigerate it for up to 24 hours before baking. Brush with egg wash and add sesame seeds right before it goes into the oven for best texture.
Absolutely. You can leave the chicken out and increase the spinach and cheese, or add sautéed mushrooms for a vegetarian version that still feels hearty.
Rice paper needs enough heat and airflow to crisp properly. Make sure your oven is fully preheated and avoid overcrowding the pan if you're making multiple spirals at once. Brushing lightly with egg wash also helps encourage browning and crisping.
Reheat slices in the oven or air fryer until warmed through and crisp again. Microwaving will soften the rice paper and take away that crunchy exterior.
Yes. Rice paper is made from rice flour and water, making it naturally gluten free. Check your sesame seeds and any seasoning labels if you're cooking for someone with celiac, but the core recipe is gluten free as written.
More recipes you'll love
- Ham & Cheese Rice Paper Spiral20 Minutes
- Chicken Parm Rice Paper Spiral20 Minutes
- Big Mac Rice Paper Spirals (Crispy, Gluten-Free Big Mac Wraps)30 Minutes
- Pistachio Baklava Rice Paper Spiral30 Minutes


Pure genius! If you read the recipe and tips, you have more than enough information to make this impressive looking and tasting dish. I was able to roll it up pretty darn easily on my first go round, making all future attempts a snap. I grilled the chicken with nothing but salt and pepper, then shredded it. I might try marinating the chicken in Greek salad dressing next time, then grill…looking for a little extra Greek flavor. If you have read this far, you will be making this! Thanks
Hi. I have a chef's fundraiser for an ADV group and have to make 200 of these for the group who will be eating many different foods during the event. So, they needs to be smaller and I will have to make ahead and freeze them. 1) will it work with just one wrapper?
2) can these be made ahead, pre-baked and reheated during the event?
3) if they cool are they still good?
4) what dipping sauce do you recommend. I will be using veg from my CSA and it's always a game to see what shows up that week 😂. Thanks so much. These look yummy and are so much fun!
Hi! So excited you're making these for the fundraiser — happy to help you plan this out.
1) One wrapper (rice paper sheet) per spiral?
Yes! This recipe already uses a single sheet per spiral (no double-layering needed, unlike some of my other rice paper recipes). For a smaller, more bite-sized version for your event, you can use a smaller sheet if you can find it, or trim a standard sheet down slightly and use a thinner line of filling — just keep the filling to roughly the thickness of your thumb or less so it rolls tightly and doesn't split open in the oven.
2) Make-ahead and reheat?
For an event of this size, I'd actually recommend fully baking these ahead of time, then reheating rather than baking from frozen raw. Reheat in the oven or air fryer at 350°F for about 5 minutes — that brings the crunch right back. Avoid the microwave, since it'll soften the rice paper and you'll lose the crispy exterior that makes these fun to eat. You can also assemble (unbaked) up to 24 hours ahead and refrigerate before baking, if that helps your prep timeline.
On freezing specifically: I haven't tested freezing these myself, so I can't promise the texture holds up perfectly, but my instinct is that fully baking first, then freezing, then reheating from frozen in the oven/air fryer (rather than freezing raw dough) would give you the most reliable result for an event. I'd do a small test batch first if you can, just to see how they hold up through your specific freezer/reheat setup before committing to all 200.
3) Still good once cooled?
They're absolutely still tasty at room temp, just less crispy — the exterior softens a bit as they sit. For a fundraiser where people are grazing over time, I'd suggest reheating in smaller batches throughout the event rather than putting all 200 out at once, so people are getting them freshly crisped rather than all cooling down together.
4) Dipping sauce?
Since you'll be improvising with whatever CSA veggies show up, I'd go with something adaptable rather than veggie-specific — my Creamy Garlic Dijon Yogurt Sauce is an easy all-purpose dip that works well with almost anything you pair it with, and it complements the feta/spinach flavors nicely. A classic tzatziki (Greek yogurt, cucumber, garlic, dill) is another great match if you want something more traditionally Greek alongside the spanakopita flavor.
Good luck with the fundraiser, these are going to be a hit! 🎉
Thank you so much. We are making test batches tomorrow and will follow your advice!
Made these at a small gathering we had. Lots of fun to make. Had the odd comment of oooh, what's in the oven? and I said "Turds" as that's what they looked like!!! Yummy Turds!!........Went down a treat!
Thanks Josh, I'll be making these again!!
Thanks so much for this review, Melissa, it means a lot. I'm so glad you loved them, no matter what they looked like! Haha!
I was a little sceptical but this was super tasty and did have a pastry-like effect. Handling the papers was easier than I expected. I replaced the chicken with pine nuts for an authentic tasting vegetarian option. Next time I would tip most of the leftover egg dip into the filling.
Hi, can you freeze these at any stage? Just asking as someone with chronic fatigue. It's useful.to have things I can batch prepare for the freezer.
Thanks in advance
Hi Fran! I'm honestly not sure because I've never done it, but I think you could assemble it, then freeze it, and then bake it from frozen. I think you might sacrifice some crispiness this way, but it'll still be tasty!
Hi there! I'm wondering if I use thawed, frozen spinach, would it need to be sautee'd before adding? Looking forward to making this!
Good question! I want to say no to make it easy, but honestly...you really should. If you don't sauté, the water will leak out into the spiral as it cooks and you won't get the crisp I'm guessing you desire!
Frozen spinach has a ton of water. You’ll need to thaw it out and squeeze all the water out to prevent a soggy mess.
Hello, just tried your recipe and the technic with the rice paper. I did a variation of filling with bacon, spinach, egg and cheese. Turned out well in the air fryer and importantly tasted great. What size rice paper did you use? I either put too much filling in, but the recipe volumes were not that different or my rice paper sheets were smaller.
Hi Daniel! I typically use standard size rice paper, which is about 8.5 to 9 inches in diameter. It's true that if you over-stuff the rice paper the spirals sometimes burst open. I'm working on a video for this recipe to help visually display how much I add.
Thanks so much for the recipe! Trying this for Midweek Meet Up on Wednesday. Everyone will be impressed!! 😉
Yum, it's perfect for something like that! Enjoy!
Thank you. I will try to recipes and let you know. Peace.
Looking forward to hearing what you think Mark! This one is tasty.