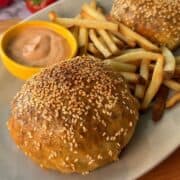
Rice Paper Cheeseburger Wellington with Crispy Fries
Two burger patties double-stacked with cheddar, pickles, raw onion, and burger sauce, wrapped in egg-washed rice paper, topped with sesame seeds, and baked until golden and crispy. Served with crispy oven fries and extra burger sauce on the side. A gluten free cheeseburger wellington that's lighter than the puff pastry version and crispier than you'd expect.
Servings 2 Wellingtons
Calories 612kcal
Equipment
- 2 small bowls or ramekins
- 1 pastry brush helpful but not required
Ingredients
Rice Paper Cheeseburger Wellingtons
- 4 rice paper sheets
- 2 eggs beaten (egg wash)
- 4 small burger patties about 2 to 3 oz each
- Salt and pepper
- 4 slices cheddar cheese
- 6 pickle slices
- 2 tablespoon diced raw onion
- 4 tablespoon burger sauce your favorite store bought version or my punchy burger sauce
- Sesame seeds for topping
Crispy Fries
- 2 large russet potatoes
- 1 tablespoon olive oil
- 1 teaspoon paprika
- 1 teaspoon garlic powder
- ½ teaspoon onion powder
- Salt and pepper
Instructions
- Start the Fries: Preheat oven to 425°F. Cut potatoes into thin fries. Rinse under cold water until water runs mostly clear — this removes surface starch, which is what allows the fries to crisp properly rather than steam. Pat completely dry with paper towels. Toss with olive oil, paprika, garlic powder, onion powder, salt, and pepper. Spread onto a parchment-lined baking sheet in a single layer. Bake for 45 to 55 minutes, flipping halfway, until deeply golden and crispy at the edges.
- Make the Burger Sauce: Prepare your Burger Sauce while the fries bake. (My Punchy Burger Sauce is excellent here and is very easy to make!)
- Cook the Burger Patties: Heat a skillet over medium-high heat. Add burger patties and let them brown before seasoning — seasoning too early draws moisture to the surface and slows the browning. Once browning starts, season with salt and pepper. Cook 2 to 3 minutes per side until cooked through. Set aside to cool slightly.
- Reduce Oven Temperature: Drop oven to 400°F once the fries are done or nearly done.
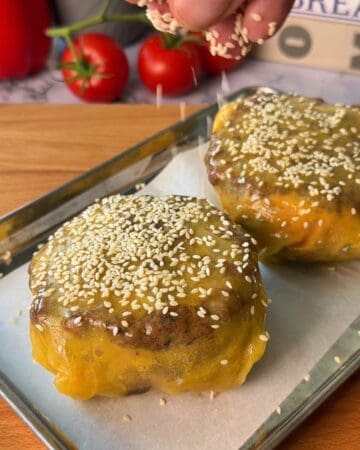
- Build the Rice Paper Wellingtons: Dip 2 rice paper sheets one at a time into the beaten egg wash until slightly softened. Lay them overlapping over a small round bowl or ramekin. Layer in this exact order: one burger patty, one slice of cheddar, 1 tablespoon burger sauce, 3 pickle slices, 1 tablespoon diced raw onion, second burger patty, second slice of cheddar. Fold the rice paper edges up and inward, sealing tightly. Flip onto a parchment-lined baking sheet seam-side down. Brush the top and sides generously with remaining egg wash. Sprinkle with sesame seeds. Repeat with the second Wellington.

- Bake: Bake at 400°F for 18 to 22 minutes until deeply golden, crispy, and browned all over.
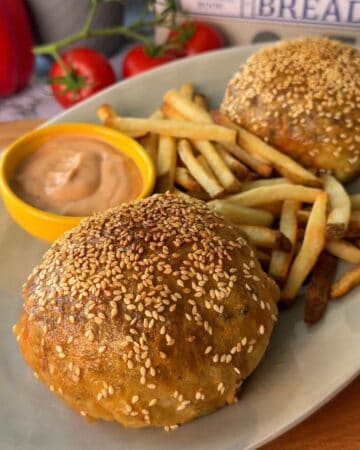
- Serve: Serve hot with crispy fries and extra burger sauce on the side.
Video
Notes
- On the Fry Timing: Start the fries first — they take 45 to 55 minutes and the Wellingtons take 18 to 22. If you time it right, the Wellingtons go in during the last 20 minutes of the fry cook time and everything comes out together. Don't rush the fries by cranking the heat. They need sustained time at 425°F to develop the deep golden color and crispy edges. Patience here is the whole technique.
- On the Rice Paper Seal: The seal is the most important step. Any gap in the rice paper will open during baking and the filling will push out. Fold the edges inward with real overlap and press firmly. Flipping seam-side down onto the baking sheet adds gravity as a backup — the weight of the Wellington holds the seam closed through the bake. If a gap forms before it goes in the oven, press it closed with wet fingers.
- Comparing This to the Puff Pastry Version: The puff pastry Cheeseburger Wellington is richer, more indulgent, and has that laminated buttery crunch that rice paper can't replicate. This version is lighter, crispier in a different way, and naturally gluten free. Neither is better. They're genuinely different eating experiences. The puff pastry version feels like a special occasion. This one feels like a weeknight win that still looks impressive on the plate.
Nutrition
Serving: 1 Wellington + ½ the Fries | Calories: 612kcal | Carbohydrates: 64g | Protein: 26g | Fat: 28g | Saturated Fat: 11g | Polyunsaturated Fat: 3g | Monounsaturated Fat: 11g | Trans Fat: 0.01g | Cholesterol: 216mg | Sodium: 706mg | Potassium: 1152mg | Fiber: 4g | Sugar: 2g | Vitamin A: 1117IU | Vitamin C: 13mg | Calcium: 329mg | Iron: 5mg
