

Fudgy Brownie Cookies with Crackly Tops
These fudgy brownie cookies have shiny, crackly tops, fudgy centers, and chewy edges; every bite tastes like the corner piece of a brownie pan, which is why we DEVOUR them in our household. Six ingredients, one bowl, no mixer, and they're ready in about 20 minutes.
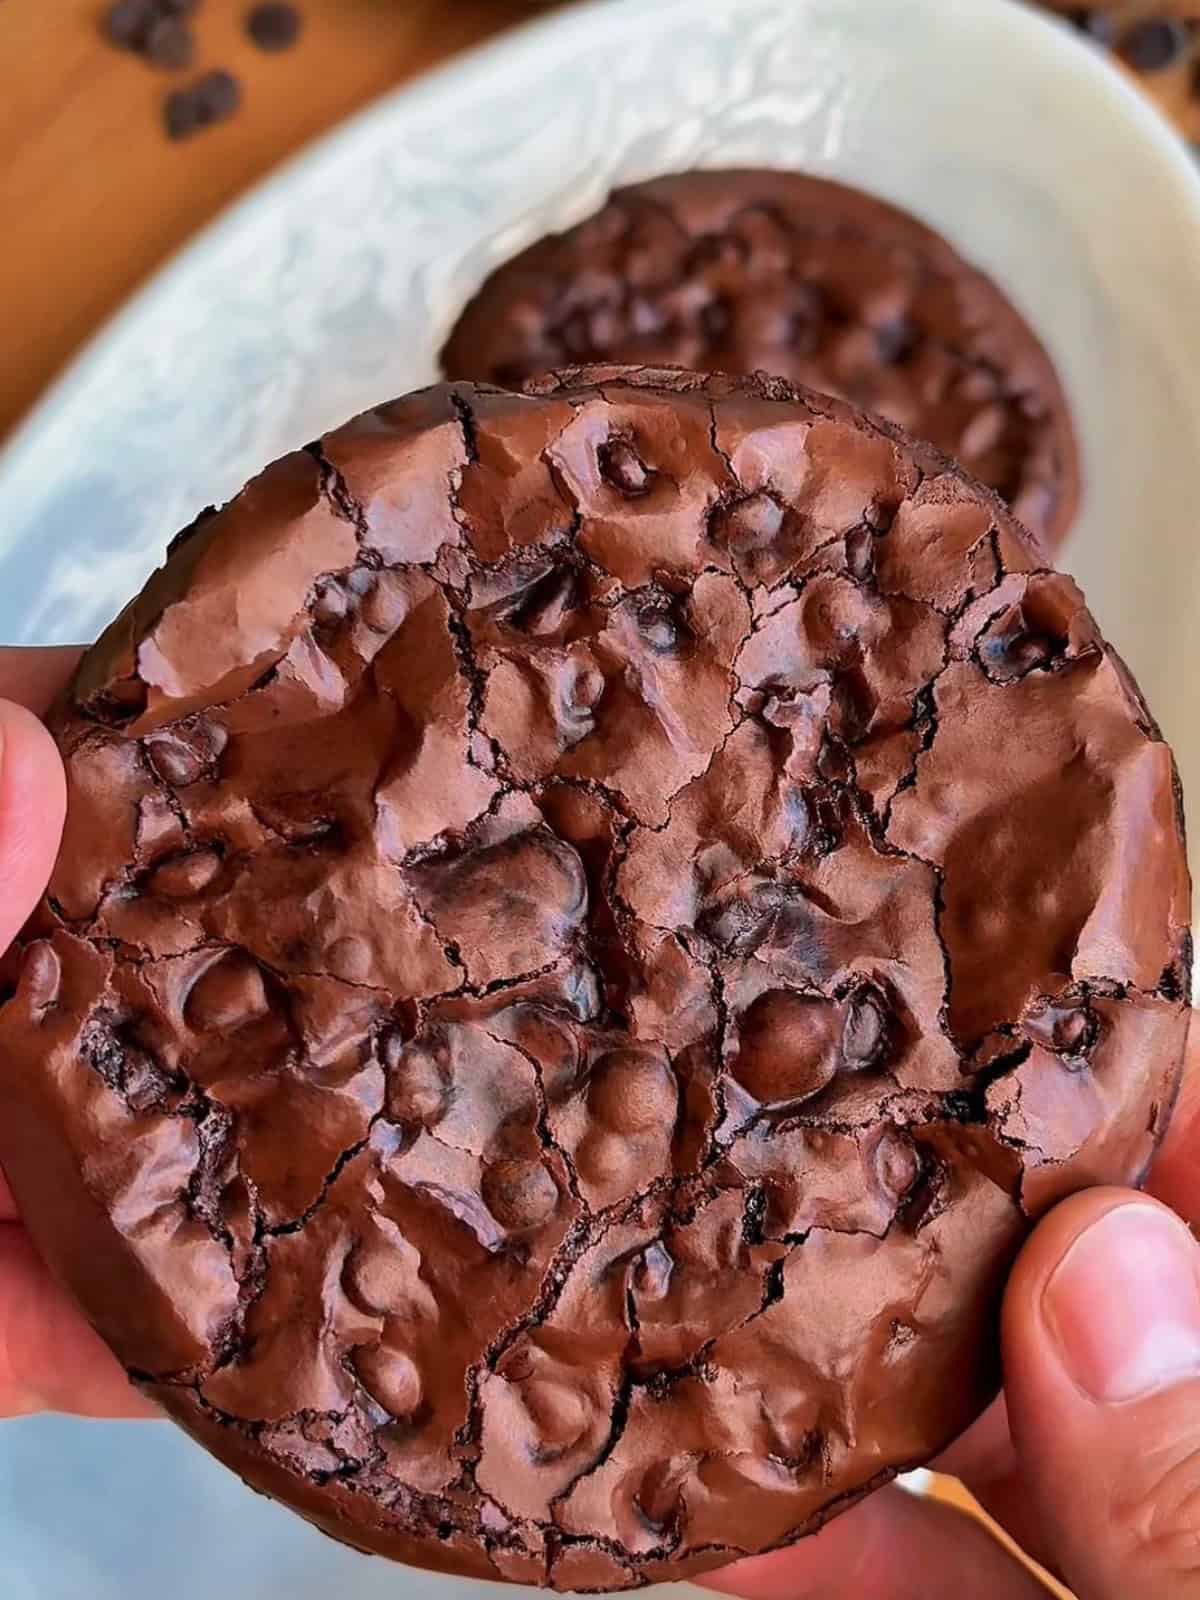
Quick Look: Fudgy Brownie Cookies
- 🍪 Makes: 12 cookies
- ⭐ Features: Fudgy, No-Mixer-Needed, Naturally Gluten-Free
- ⌛️ Prep Time: 10 minutes
- 💥 Cook Time: 11 minutes
- 🕑 Total Time: 21 minutes
- 👩🍳 Skill Level: Beginner
- 🏆 Why make THIS version? Anyone else fight for the corner pieces of a brownie? These cookies mean there's no more fighting; Every single bite tastes like the best one.
ASK QUESTIONS, SUMMARIZE AND SAVE THIS RECIPE ON
Key Ingredients

- Powdered sugar - The secret behind the glossy, crackled top we're after. It dissolves completely into the egg whites (instead of staying grainy like granulated sugar would). It's the secret in my pistachio brownie cookies too, because it makes such a difference.
- Egg whites (not whole eggs) - We skip the yolks because the yolks would make these cakey. We're going for crispy, crackly. The egg whites alone give structure and chew!
- Cocoa powder - The whole brownie flavor comes from the cocoa! There's no flour or melted chocolate bar in the batter, so the cocoa powder does all the work here.
- Chocolate chips - We fold these in last so they stay whole and gooey; I think the cookies look prettier this way since it adds texture, and it keeps them rich and rewarding in every bite!
Substitutions & Additions
- Add chopped walnuts or pecans, white chocolate chips, or crushed pretzels for a salty crunch. Try to keep total mix-ins under about ½ cup (otherwise the batter gets overloaded).
- Mini M&Ms work well too if you want extra color and crunch folded in with the chocolate chips.
- Want a different simple, no-mixer cookie? My 6-ingredient banana chocolate chunk cookies follow the same one-bowl approach, and my Ferrero Rocher chocolate hazelnut cookies are worth a look if you want a completely different chocolate vibe!
- Curious about a sugar substitute like Swerve? I haven't tested it myself, and I'd manage expectations: the crackly top here comes specifically from real powdered sugar dissolving into the egg whites, and erythritol-based substitutes don't dissolve or caramelize the same way. You'd likely still get a chocolatey cookie, but you'd probably miss the shiny crackle and find them to be slightly more gritty in texture. If you're committed to using a sugar substitute, I'd opt for a blend of part Swerve, part real powdered sugar before a full swap.
How To Make My Brownie Cookies
This is an overview of the recipe steps. All ingredient measurements and detailed process steps are provided in the recipe box below.

- Whisk the egg whites and powdered sugar until completely smooth and glossy, with no graininess left.

- Fold in the cocoa powder, salt, and vanilla until just combined.

- Fold in the chocolate chips until evenly distributed.

- Scoop about 2 tablespoons of batter per cookie, spacing at least 3 inches apart.

- Bake at 375°F for 2 minutes, then immediately drop the oven to 350°F and continue for 8 to 9 minutes, until the tops are shiny and crackled but the centers still look soft.

- Cool on the baking sheet for 10 minutes, then transfer to a wire rack.
Fudgy Brownie Cookie FAQs
Not to me. Brookies combine brownie batter and cookie dough baked together, usually in a bar or layered format, like my high-protein cream cheese stuffed brookie bars. Brownie cookies are made entirely from brownie-style batter (no cookie dough at all), so what you get is a single cookie with the texture of a brownie: crackly top, fudgy center, chewy edges.
The initial blast at 375°F sets the shiny surface crust quickly, locking in the crackle before the cookie has a chance to spread too thin. Dropping to 350°F right after lets the center cook through slowly without overbaking; it's the same logic as searing meat before finishing at a lower heat (fast crust formation, then a controlled interior).
Yes, this recipe is designed for it. A bowl and a whisk are all you need! Just whisk the egg whites and powdered sugar long enough to get them fully combined and glossy before adding anything else.
These have a high sugar content, so they can sometimes come out of the oven quite sticky and be difficult to remove from the parchment. If, after letting your cookies cool for 10 minutes on the baking sheet, you still find them difficult to remove, let them cool even longer (30 to 40 minutes total). Then, remove them with a metal spatula.
Room temperature in an airtight container for up to 4 days. I find they actually get chewier on day 2, which most people prefer! Don't refrigerate them; cold air dries them out, and you lose the fudgy texture. They also freeze well for up to 2 months (thaw at room temperature for about 30 minutes before eating). For another freezer-friendly chocolate treat, my fudgy high-protein two-bite brownies hold up the same way.
Chef Josh's Expert Tips
- On pulling them early: The centers should still look underdone when you take them out, because carry-over heat finishes the job as they cool. If you wait until they look set in the oven, they'll be overbaked by the time they cool.
- On spacing: These spread more than you'd expect, so give them a full 3 inches apart. If you crowd them, they'll steam each other instead of crackling at the edges.
- On the portion size: If you want small cookie-sized cookies rather than a more "puddle" look, scoop closer to a tablespoon instead of the full 2 tablespoons. A couple of readers found the full scoop spreads more like brownie brittle than a cookie. It's still delicious, of course, just a different shape. If you're chasing that same fudgy flavor in a totally different format, my high-protein molten brownie lava cake is worth a look too...

More from the brownie and fudgy chocolate family...
- Crispy Crackly Chewy Pistachio Brownie Cookies22 Minutes
- High-Protein Cream Cheese Stuffed Brookie Bars1 Hours 47 Minutes
- Fudgy High-Protein Two-Bite Brownies32 Minutes
- High-Protein Molten Brownie Lava Cake28 Minutes


If you make this one, I really want to hear about it! Please leave a comment and ★★★★★ star rating below (that helps everyone else know what the favorites are). Feel free to tag me on Instagram too, so I can see your creations 😎.
Recipe

Fudgy Brownie Cookies with Crackly Tops
Watch:
Ingredients
Method
- Prep: Preheat oven to 375°F. Line two baking sheets with parchment paper.
- Whisk the egg whites and 3 cups powdered sugar together until smooth, glossy, and fully combined. The mixture should look thick and shiny with no graininess (don't rush this step).
- Add the ½ cup cocoa powder, ½ teaspoon salt, and 1 teaspoon vanilla. Fold gently until just combined. The batter will look more like brownie batter than cookie dough.
- Fold in the ½ cup chocolate chips until evenly distributed.
- Drop about 2 tablespoons of batter per cookie onto the prepared baking sheets, spacing at least 3 inches apart, these spread.
- Bake for 2 minutes at 375°F, then immediately reduce the oven to 350°F and continue baking for 8 to 9 minutes, until the tops are shiny and crackly but the centers still look soft.
- Cool on the baking sheet for 10+ minutes before transferring to a wire rack (they will continue to set as they cool).
Notes
- Pull the cookies from the oven when the centers still look underdone. Carry-over heat does the rest as they cool on the pan. If you wait until the centers look set in the oven, they'll be overbaked by the time they cool.
- Spacing matters more than you'd expect. The batter spreads significantly; leave at least 3 inches between each scoop. Crowded cookies steam each other, and you lose the crackle on the edges.
- The powdered sugar dissolving fully before you add the cocoa is the step most people rush. Whisk the egg whites and powdered sugar until completely smooth and glossy, with no graininess. That smoothness is what gives you the shiny top.
- These cookies have a high sugar content, so they can be difficult to remove from the parchment (even after 10 minutes of cooling). If that happens, let them cool on the parchment for 30 to 40 minutes, then remove with a metal spatula.
- These keep well at room temperature in an airtight container for up to 4 days. The texture actually improves on day two as the center sets and becomes chewier.
Nutrition
Tried this recipe?
Let me know how it was!Note: Some links on this page may be affiliate links. If you buy something through them, I earn a small commission at no extra cost to you. I only ever link to stuff I actually use and love.


Can i use chocolate bars instead of chocolate chips?
Hi DC, yes, chopped chocolate bars work great here — actually even better in some ways, since you get those little chocolate shards and pools throughout instead of whole chips holding their shape. Just chop it roughly to a similar size as chocolate chips so it distributes evenly.
Mine are still cooling but smell delicious! My batter was sooo thin compared to yours so they spread so quick when putting on cookie sheet. I used liquid egg whites from a carton—could that have caused the difference?
Hi Melissa, that's almost certainly it! Carton liquid egg whites are pasteurized and often slightly diluted/processed compared to whites cracked fresh from the shell, which can throw off how thick and glossy your batter gets in that first whisking step. Since the whole structure here depends on that thick meringue-like base to hold its shape, thinner whites means thinner batter and more spread. I'd recommend fresh-cracked egg whites for these specifically; hope the next batch turns out closer to what you're after — but I bet they still taste great even spread thin!
delicious cookies! why do they go flat after coming out of the oven tho? how can i get them to stay thicker after they bake and not thin and crumbly
Thanks Annalyse, glad you liked them! A couple things help a lot if they're too flat for your liking: 1) give them at least 3 inches between scoops on the tray (crowding makes them steam each other and lose that crackly edge). 2) I also bake these in two stages — 375°F for the first 2 minutes to set the crust fast, then drop to 350°F for another 8-9 minutes — which locks in the surface before they have a chance to spread too thin. And, 3) don't pull them too late: they should still look a little underdone in the center when you take them out, since carry-over heat finishes the job as they cool. That should all help with the next batch... let me know what results!! 🙂
Your amazing love all your recipes.
Can I use swerve sugar free powder sugar? Thanks 😊
Hi Susan! I haven't tested this with Swerve, but I'd manage expectations a bit: the crackly top here specifically comes from powdered sugar fully dissolving into the egg whites to form a glossy, meringue-like batter. Swerve and other erythritol-based sweeteners don't dissolve or caramelize the same way real sugar does, so you'd likely still get a chocolatey cookie, but probably lose that shiny crackle and might notice a slightly gritty texture instead. If you try it, I'd love to hear how it goes! You could also try a blend, part Swerve and part real sugar, to see if that gets you closer to the classic result.
Wow, I love these so much!!! exactly like brownie top crust pieces the texture the tackiness the flavor so good!! ill be honest i was scared by how soupy the batter was but you have to trust the process!! i would suggest more like a TBSP or less if you want actual cookie sized cookies or I broke them up into pieces like brownie brittle!! you wont regret making these ( ps great with mini m&ms )
Soooo good!! Super quick too! Saw the other comment about sticking so I let the cookies cool a little longer and peeled away the parchment, came out great!
I baked a batch of these today and they did not turn out as expected. They stuck to the parchment paper and crumbled when I tried to peal the paper off of them. I only baked six, but made the recipe as written. Do you think I could put the rest of the batter in a baking dish and bake all together and serve it as a dessert you eat with a spoon? I hate to waste the batter.
Hi Tracy, these cookies do have a high sugar content so they do feel quite sticky when they come out of the oven. Letting them cool on the parchment for 30-40 minutes after baking helps with that, followed by removing them with a metal spatula. That said, you can definitely bake the remaining batter into brownies and eat with a spoon -- it would be delicious!
Thank you so much for these recipes 💕
I would love to see more Gluten-free recipes 😋
hi louise, wildly, most of my recipes are naturally gluten free! i tend to use a ton of almond flour and oat flour, simply because i prefer it over regular. 🙂 I'm working on creating a collection so they're easy to browse and search. for now, you can see most of the gluten free recipes here: https://thechefoutwest.com/category/gluten-free/. more to come!